The following guide is meant to give you a step by step instruction on how to replace a broken, damaged or cracked LCD assembly on an iPhone 4. Please be sure to take care during all steps of this repair as parts and flex cables can be easily damaged or broken. As well, you must be sure to keep track of where each screw is removed from so that when it comes time to re-install them you know exactly where to put them. When removing or lifting flex cables, it is suggest to use plastic spudgers or plastic opening and lifting tools. Before continuing it is advised to read the disclaimer at the bottom of this article.
We suggest the following parts and tools for this repair:
Remove the 3.6mm Pentalobe or Phillips #000 screws located at the bottom of the phone near the dock connector. Note: The 5-point Pentalobe Screwdriver should only be used once as it has the potential to strip the screws.
Push the rear panel toward the top edge of the phone and remove it with your fingers or a suction cup.
Remove the Phillips head screw that is securing the battery to the logic board, pry the battery flex cable connector up and pull the plastic tab to remove the battery out of the iPhone.
Eject the SIM card using a paper clip or SIM Card eject tool.
Remove the Phillips head screws located just to the left of where the battery was installed.
Disconnect the dock port flex cable and antenna from the logic board.
Remove the Phillips head screw located underneath the dock flex cable on the lower left hand side of the iPhone.
Remove the five Phillips head screws located at the top left, middle and middle right side of the phone just above where the battery was installed. The top two right screws can be left in place for the time being.
Carefully remove the Wi-Fi antenna from the logic board.
Remove the rear camera flex cable from the logic board.
Remove the white circular sticker covering the screw near the battery pull tab and remove the Phillips head screw.
Disconnect the Digitizer Flex Cable, LCD Flex Cable, Headphone Jack Flex Cable, Microphone Flex Cable and Front Camera Flex Cable from the logic board.
Remove the standoff near the headphone jack with a flathead screwdriver.
Carefully remove the logic board from the iPhone.
Remove the Philips head screw that is securing the speaker enclosure and proceed to lift the speaker enclosure and remove it from the iPhone.
Remove the two Phillips head screws at the top right of the phone, above where the battery was seated and remove the vibrator from the iPhone.
Remove the Phillips screw from the front panel near the headphone jack.
Remove the three Phillips screws from the side of the frame near the volume button, the two bottom screws in each corner, the three screws along the SIM card side of the frame and the screw near the rear camera.
Carefully remove the LCD assembly from the iPhone. A spudger may be used to help remove the adhesive applied below the home button.
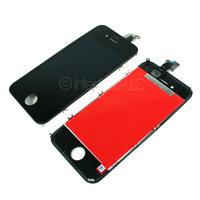
Install your new LCD assembly. Be sure to remove the LCD protector on the back side of the screen and remove the front plastic film after your phone has been completely re-assembled.
Re-install all the parts that have been removed back into your phone, working in reverse order, securing all the screws in the right places and re-attaching all the flex cables as necessary.
Disclaimer
Note that the above information is provided for informational purposes only. We take no liability in for any damage or losses that may be done as a result of in-experience. If you are not comfortable with making repairs or cannot afford the loss of your device we suggest to contact an experienced professional to complete your repair.